

I ordered Nuts.com chocolate covered Oreos from Amazon after seeing them constantly on TikTok and Instagram. They showed up, I tried them, and they were good.
They have a thick coating, smooth chocolate, that satisfying crunch when you bite through the chocolate into the Oreo. But the price stopped me cold, it cost around $10 to $15 for about 10 to 12 pieces.
That’s when I decided to make them at home.
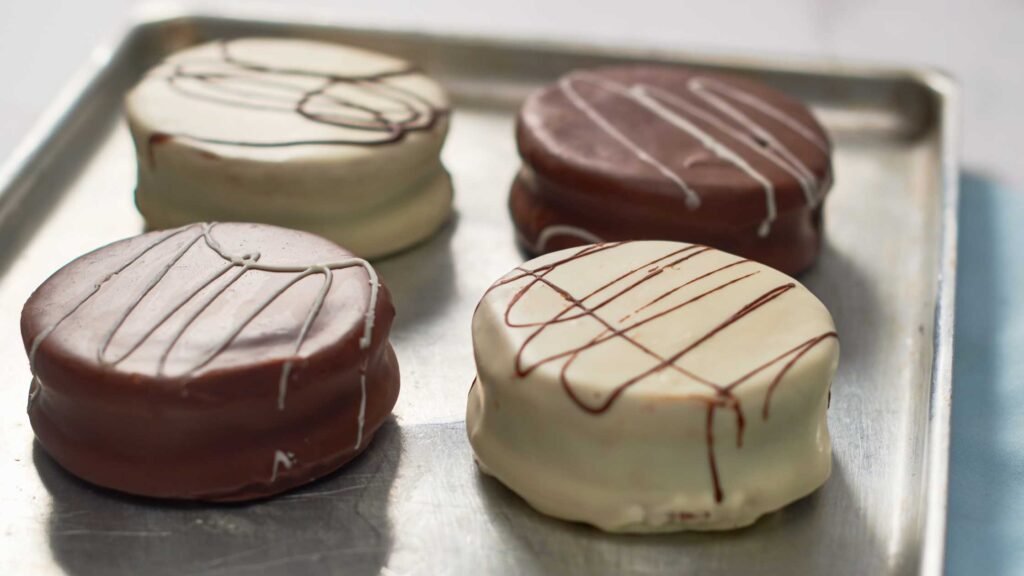
A couple of attempts later, I had chocolate covered Oreos that looked and tasted almost identical, made in about 30 minutes, for roughly half the cost.
My 4-year-old cousin also helped me make them. I let him do the dipping, and he took it very seriously.
What Makes Nuts.com Chocolate Covered Oreos Worth Copying
The Nuts.com version stands out because the chocolate coating is thick and genuinely smooth, not thin or waxy like some store-bought versions.
It coats the whole cookie evenly and sets with a proper snap.
The chocolate quality is better than what you’d get from a regular candy melt.
That’s the main thing to replicate at home: the thickness of the coating and the quality of the chocolate, and everything else is just technique.
Ingredients
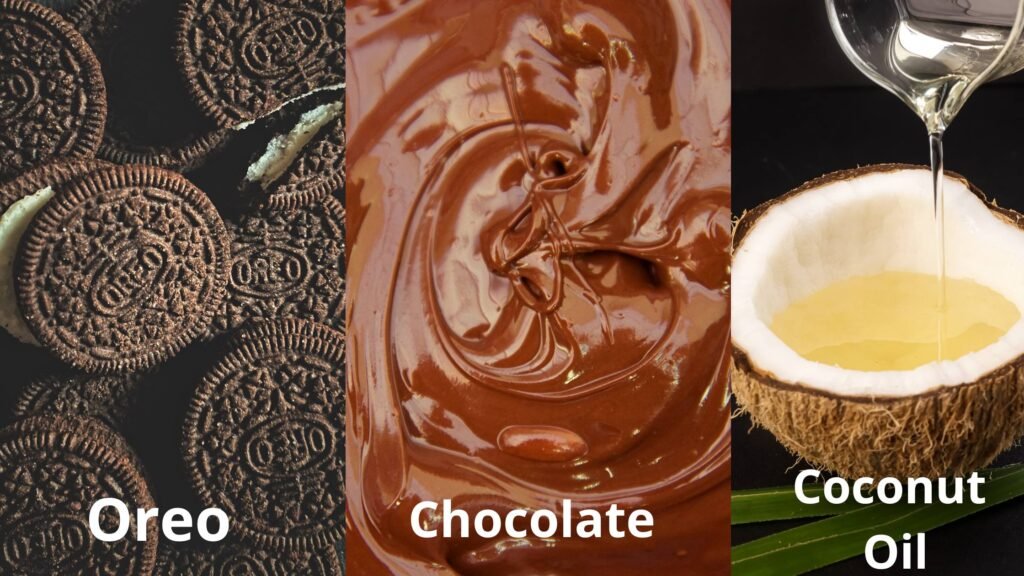
Makes 40 chocolate covered Oreos (2 standard packs).
Main Ingredients:
- 40 Oreos (2 standard packs: Regular Oreos work perfectly, you can also use Golden Oreos, Double Stuf, or any limited-edition flavor you want to try)
- 12 oz high-quality chocolate, dark, milk, or white (use a bar, not chips. Ghirardelli and Guittard both work well. Chips have stabilizers that make the chocolate coating thin and waxy instead of thick and smooth)
- 1 tsp coconut oil, optional (thins the chocolate slightly and makes dipping easier without affecting the flavor)
Optional Toppings:
- Crushed pistachios, almonds, or peanuts (I use pistachios because I love them)
- Sprinkles or edible glitter
- Flaky sea salt
- Caramel sauce for drizzling
- Crushed candy canes for a holiday version
Beginner tip: If you’ve never worked with real chocolate before and want something easier to handle, candy melts are a forgiving alternative, they’re more fluid and set faster.
But their flavor isn’t as rich as real chocolate, they’re much harder to mess up and come in every color imaginable for themed events.
Dietary Swaps
- Gluten-free: Swap regular Oreos for gluten-free Oreo cookies
- Dairy-free: Use Enjoy Life or Hu Kitchen dairy-free chocolate
- Vegan: Both of the above together. Regular Oreos are actually vegan, so just swap the chocolate
How to Make Chocolate Covered Oreos
Step 1: Prep Your Workspace
- Line a baking sheet with parchment paper.
- Set up your toppings in small bowls before you start melting chocolate.
- Once the Oreos are dipped, you have maybe 30 seconds before the chocolate starts setting, so you want everything ready to go.
Step 2: Melt the Chocolate
Double boiler method:
- Fill a saucepan with 1 to 2 inches of water and bring to a gentle simmer.
- Place a heatproof bowl on top, make sure the bottom doesn’t touch the water.
- Add the chopped chocolate and stir until fully melted and smooth.
- Add coconut oil now if using.
Step 3: Dip the Oreos
- Use a fork to lower each Oreo into the melted chocolate.
- Flip it over so both sides are coated.
- Lift it out and tap the fork lightly against the side of the bowl a few times to let the excess chocolate drip off.
- This gives you a cleaner, more even coat rather than a thick blob pooling at the bottom.
- Place each dipped Oreo on your parchment-lined baking sheet.
Step 4: Add Toppings
- Sprinkle or drizzle your toppings immediately after placing each cookie down, while the chocolate is still wet.
- Once the chocolate sets, nothing will stick.
Step 5: Let Them Set
- Leave them at room temperature for 30 to 60 minutes until the chocolate is fully hardened.
- If you want to speed it up, refrigerate for 15 minutes.
- Room temperature gives a slightly shinier finish, the fridge is just faster.
Oreo Pops on a Stick
- Insert a lollipop stick into the cream filling of each Oreo before dipping.
- Press it in about halfway so it holds firmly.
- Then dip the whole thing in chocolate as normal.
Oreo pops look great at parties and make gifting easier since you can stand them upright in a glass or wrap each one individually in cellophane.
Kids love them, and they’re easier to eat without making a mess.
Tips for Getting the Chocolate Right
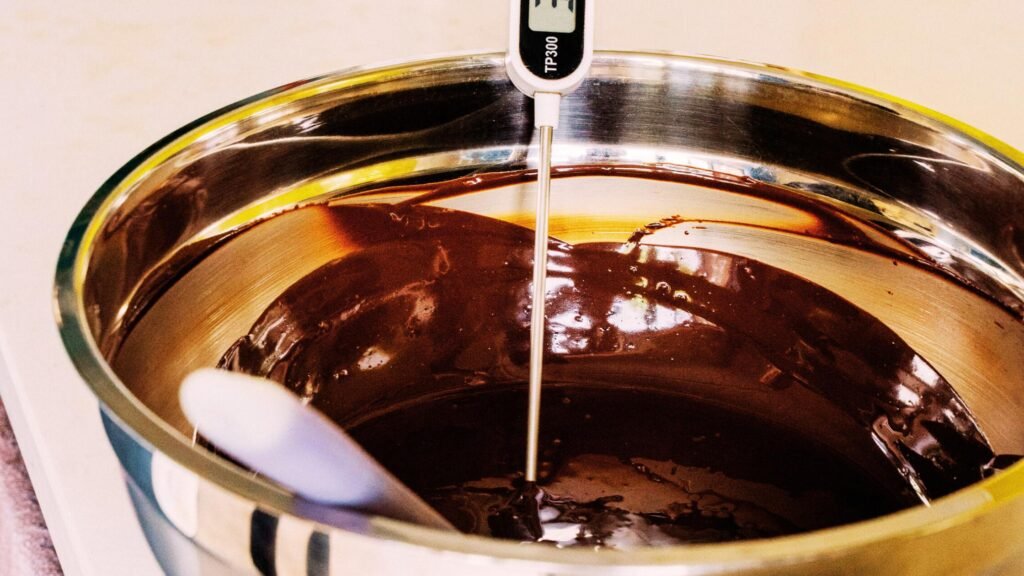
- Use a bar, not chips: The single biggest mistake people make is using chocolate chips. Chips are formulated to hold their shape during baking, which means they contain stabilizers that make melted chocolate thicker and waxier. A chopped chocolate bar melts cleaner and sets with a much better snap and shine.
- Temper for a professional finish: If you want that glossy, smooth look like the Nuts.com version, temper the chocolate. Melt two-thirds of it, then stir in the remaining one-third off the heat until everything is smooth. This stabilizes the cocoa butter and gives you a shiny coating that snaps cleanly.
- Double dip for thickness: Let the first coat set for about 15 minutes in the fridge, then dip each Oreo a second time. This is the closest you’ll get to replicating the thick coating of the store-bought version.
- Keep toppings ready: Have everything measured and within arm’s reach before the first cookie goes in. You’re working against the clock once the chocolate starts to set.
Variations Worth Trying
Golden Oreos with white chocolate: White chocolate plus the vanilla flavor of a Golden Oreo is a great combination. Add rainbow sprinkles for a birthday or celebration version.
Mint Oreos with dark chocolate: Dip mint-flavored Oreos in dark chocolate and immediately dust with crushed candy canes. This is one of the best holiday treat combinations you can make.
Marble effect: Melt both white and dark chocolate separately. Pour them into the same bowl without fully mixing, then dip. Each cookie comes out with a different marble pattern. Great for gifting because they all look unique.
Ruby chocolate: If you can find ruby chocolate (it has a natural berry-like flavor and a pink color), it makes a stunning and different-tasting version that people always ask about.
Seasonal sprinkles: The recipe itself stays the same year-round. Just switch the sprinkles: red and green for Christmas, pastels for Easter, red and pink for Valentine’s Day, orange and black for Halloween. Takes 30 minutes and looks completely different each time.
What to Serve With Chocolate Covered Oreos

- Coffee or espresso: The bitterness cuts through the sweetness of the chocolate coating, It is a classic combination.
- Hot chocolate: Pair these with a warm mug for the ultimate chocolate-on-chocolate experience. This Crockpot Hot Chocolate with Instant Mix is a simple option that works well alongside.
- On a dessert platter: These sit perfectly next to Chocolate Covered Pretzel Rods and Luxury Chocolate Covered Strawberries for a full chocolate spread. The three together cover crunchy, creamy, and fresh all at once.
- Crumbled over ice cream: Break a couple into pieces and scatter over vanilla ice cream. The chocolate shell adds crunch and the Oreo cream melts into the ice cream.
- As an edible gift: Pack them in a mason jar layered with tissue paper, tie a ribbon around it, and they’re ready to give. They hold up well at room temperature for two weeks.
How to Gift These
These travel well and look genuinely impressive given how little effort they take.
- Mason jar: Layer cookies in with tissue paper between them. Tie a ribbon around the jar. Done. Works for 8 to 10 cookies.
- Dessert gift box: Line a small box with parchment and arrange the Oreos alongside Chocolate Covered Graham Crackers or Chocolate Covered Pretzel Rods for a proper chocolate gift box.
- Oreo pops in a bag: Wrap each pop individually in a small cellophane bag tied with a bow. Stack a few in a gift bag. Looks like something from a bakery.
- With a recipe card: Write out or print the recipe and include it. The receiver gets the treat now and the ability to make them again later.
Storage
Keep in an airtight container at room temperature for up to 2 weeks. Parchment paper between layers stops them from sticking together.
To freeze: place in a single layer on a parchment-lined tray, freeze until solid (about an hour), then transfer to a freezer bag with parchment between layers. Keeps for up to 3 months. Let them come to room temperature for about 10 minutes before eating.
Nutrition
Per cookie (based on 40 servings, with dark chocolate coating):
- Calories: approximately 95 to 110
- Fat: 5g
- Carbs: 12g
- Sugar: 8g
Numbers shift depending on the chocolate type and how thick your coating is. Dark chocolate keeps sugar lower. White chocolate pushes it up.
FAQs
How do you make chocolate covered Oreos?
Melt good-quality chocolate in a double boiler or microwave.
Dip each Oreo using a fork, tap off the excess chocolate, place on parchment paper, add toppings while the chocolate is still wet, and let set for 30 to 60 minutes at room temperature or 15 minutes in the fridge.
How do you make chocolate covered Oreos with chocolate chips?
You can use chips but they produce a thicker, waxier result because of the stabilizers they contain.
If chips are all you have, add a teaspoon of coconut oil to help thin the chocolate and improve the texture.
Still edible, just not as smooth or glossy as a proper chocolate bar.
Can you make chocolate covered Oreos with a mold?
Yes, Pour a thin layer of melted chocolate into each mold cavity, place an Oreo on top, press down slightly, then cover with more chocolate, chill until set and pop them out.
The mold gives you cleaner edges and a more uniform look than the fork-dip method. It’s also easier with kids since there’s less dripping involved.
How many calories do chocolate covered Oreos have?
Roughly 95 to 110 calories per cookie when coated in dark chocolate.
White or milk chocolate will push that slightly higher.
The Nuts.com version likely lands in a similar range depending on their coating thickness.
What if my chocolate seizes or becomes too thick?
Add a tablespoon of coconut oil or neutral vegetable oil and stir vigorously.
Warm the mixture slightly if needed.
Chocolate seizes most often from overheating or from any moisture getting into the bowl.
Keep all utensils completely dry and melt slowly.
Can I use other cookies instead of Oreos?
Yes. Nutter Butters, shortbread cookies, Graham Crackers, and other cream-filled sandwich cookies all work with this method.
The chocolate dipping technique stays the same. You can also try this with Chocolate Covered Graham Crackers if you want a similar but slightly different take.
Can these be made vegan or gluten-free?
Yes to both, Regular Oreos are already vegan.
For gluten-free, use certified gluten-free Oreo cookies. For dairy-free chocolate, Enjoy Life and Hu Kitchen are reliable brands. Combine all three for a version that works for most dietary restrictions.

Copycat Nuts.com Chocolate Covered Oreos
Ingredients
- 40 Oreos 2 standard packs
- 12 oz high-quality chocolate dark, milk, or white, chopped from a bar
- 1 tsp coconut oil optional, helps thin the chocolate
Optional toppings:
- ½ cup crushed nuts pistachios, almonds, or peanuts
- ¼ cup sprinkles or edible glitter
- Pinch of flaky sea salt
- 2 tbsp caramel sauce for drizzling
Instructions
Step 1: Prep
- Line a baking sheet with parchment paper.
- Set up toppings in small bowls within reach.
Step 2: Melt Chocolate
- Double boiler: simmer water in a saucepan, place heatproof bowl on top without touching water, add chocolate and stir until melted.
Step 3: Dip
- Use a fork to dip each Oreo in the melted chocolate.
- Tap the fork on the bowl edge to remove excess.
- Place on parchment paper.
Step 4: Top
- Immediately sprinkle toppings while the chocolate is still wet.
Step 5: Set
- Let harden at room temperature for 30 to 60 minutes, or refrigerate for 15 minutes.
Notes
- Use a chopped chocolate bar, not chips. Chips contain stabilizers that make the coating waxy.
- For Oreo pops, insert a lollipop stick into the cream filling before dipping.
- For a thicker coating like the Nuts.com version, double dip after the first coat sets.
- Store in an airtight container at room temperature for up to 2 weeks, or freeze for up to 3 months.

I’m a self-taught home cook who turns everyday ingredients into comforting, café-style recipes. I test everything in my own kitchen (sometimes more than once), tweak flavors how I like them, and share only what I actually enjoy.
Most of my recipes are chocolate-based or have a creative twist, and I keep them preservative-free, beginner-friendly, and fun to make.
If you love cozy drinks, healthier desserts, or bold flavor combos — you’re in the right place. [Read full story]