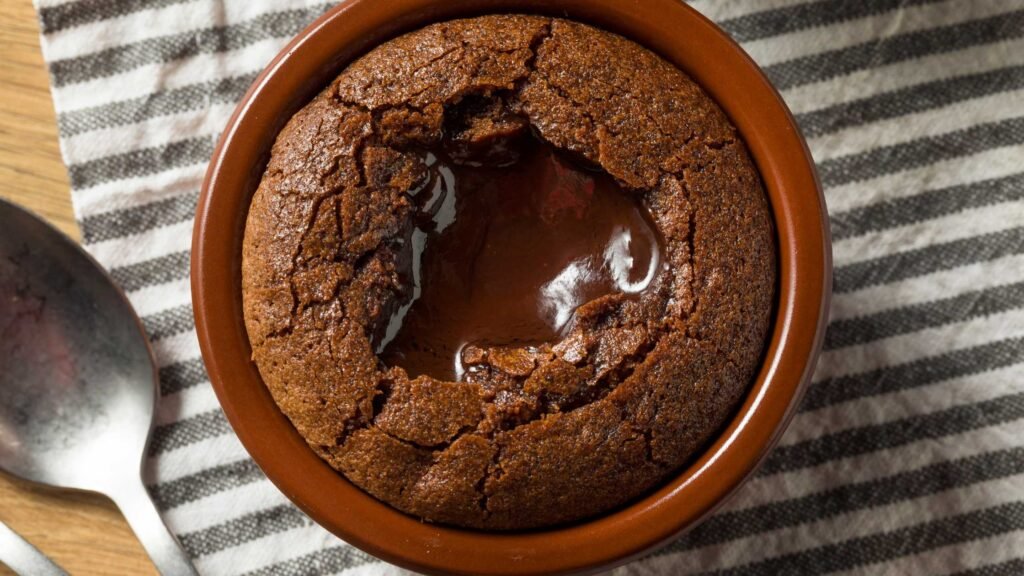
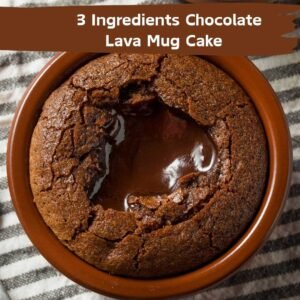
Do you want to make a gooey molten chocolate mug cake within minutes without eggs or complicated ingredients? Then you should try this Chocolate Lava Mug Cake 3 Ingredients No Egg recipe.
It’s an eggless microwave chocolate lava cake, which is soft on the outside with a warm, molten chocolate center inside.
It is a perfect late-night treat, which I sometimes have.
You don’t need an oven, no eggs, no gluten, and no fancy baking skills because I am giving you a simple and easy recipe that you can try.
Why You Should Try This Chocolate Lava Mug Cake
You should try this recipe because:
- It only needs 3 simple ingredients for a mug cake that are easily available at home. Whether you love chocolate desserts or want a quick chocolate fix, this easy lava mug cake without eggs is perfect for you.
- It is eggless, so you can enjoy it even if you’re vegan.
- It’s made in a mug, in the microwave.
- It takes less than 10 minutes from start to finish, so you can enjoy a fresh lava mug cake every time; no need to make it ahead.
- You’ll get a molten chocolate center, which is quite like what we get in restaurants.
One more thing that I like about these Chocolate Lava Mug 3 Ingredients cake is that it is cheaper when making it at home as compared to buying it at a restaurant.
It is also more customizable as you have control over ingredients. Plus, you can top it with any of your favorite things like Whipped cream, ice cream, berries, or just extra white or dark melted chocolate.
Ingredients You’ll Need to make this Lava Mug Cake without Eggs
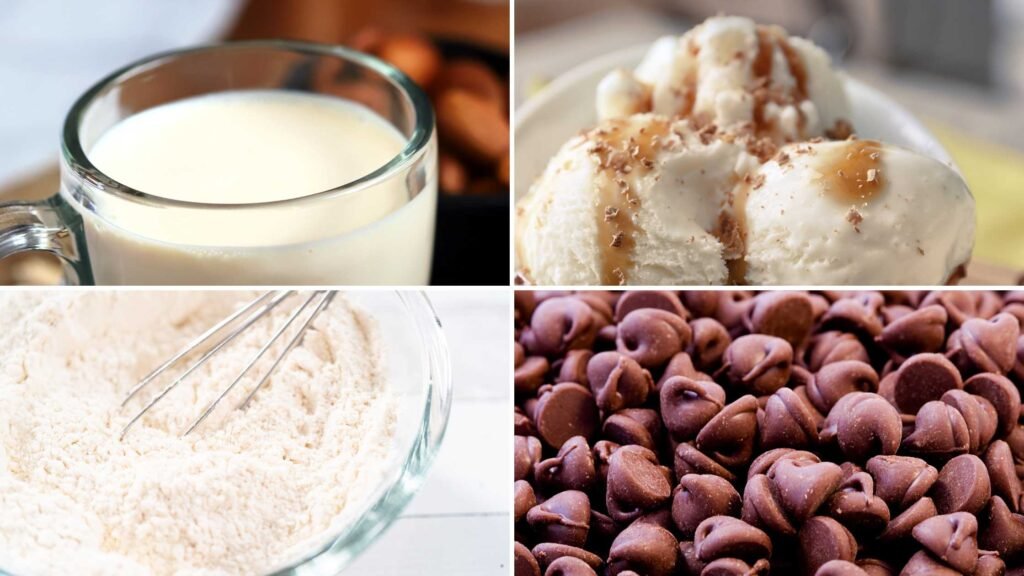
These are the 3 ingredients you need for this lava mug cake recipe. And chances are, you already have them at home:
- Semi-Sweet Chocolate Chips or Bar (About 1/3 cup or 60g): You can use chocolate chips or chopped semi-sweet chocolate. Both work well. Plus, you shouldn’t use candy bars with added caramel or fillings. Smooth chocolate is better for lava texture.
- Milk (3 tablespoons): You can use regular whole milk. But if you want a dairy-free version, then you should use almond milk, oat milk, or coconut milk. For a creamier alternative, you could also try this Hot Chocolate with Cocoa Powder and Almond Milk recipe as inspiration.
- All-Purpose Flour (2 tablespoons): This will give structure to your microwave chocolate lava cake and it will allow the outer layer to set while keeping the center gooey. It’s the base of this eggless mug cake recipe.
Optional but recommended:
- You can add a pinch of salt to balance sweetness.
- Consider adding a few extra chocolate chips in the center to boost the lava flow
- Powdered sugar or vanilla ice cream for topping
Step-by-Step Guide: How to Make 3 Ingredient Lava Mug Cake
Here is the step-by-step of how you can make this chocolate lava mug cake with 3 ingredients without egg within just 10 minutes from start to finish.
Step 1: Melt the Chocolate
- You need to have a microwave-safe mug, and then you want to add your chocolate chips or chopped chocolate, and then microwave for 30 seconds, and then stir.
- Again, microwave for another 15 to 20 seconds and stir.
- You want to do it until the chocolate is completely melted.
Step 2: Add Milk and Flour
- You want to add 3 tablespoons of milk to the melted chocolate that is in the mug.
- Now, Mix it well until it’s fully combined and glossy.
- Add 2 tablespoons of all-purpose flour.
- Stir everything until there are no lumps.
Note: If the batter looks too thick, you can add a little milk. It should be thick but still pourable.
Step 3: (Optional) Add Extra Chocolate for Lava Center
- Push a few more chocolate chips into the middle of the batter.
- You don’t wanna mix that properly—just gently press them down with the help of a spoon.
This will melt inside and give you a perfect lava effect when you dig in with a spoon while eating.
Step 4: Microwave
- Place the mug in the microwave.
- Microwave on high power for about 50 seconds. This is the key to get lava mug cake in microwave texture — firm edges with a molten, gooey chocolate center.
- If you love microwave desserts, you’ll also enjoy this Microwave Chocolate Pudding Cake Mug Recipe for another quick fix.
Make sure the edges are set, but the center should look slightly wet. That’s what will give you the lava texture.
Note: Don’t overcook. Otherwise, this chocolate lava cake will turn into a regular mug cake without lava.
Step 5: Cool Slightly and Serve
- Let your homemade cupcake sit for about 1 minute. It’ll finish setting while staying gooey in the center.
- You can eat it directly from the mug, or you can also flip it onto a small plate. I personally ate in the cup, as I didn’t want to wash another plate alongside the mug.
3 Ingredients Lava Mug Chocolate Cake Texture and Taste
The cake from the outside is firm and soft, like a brownie. For another indulgent single-serve dessert, you may like these Mini Lava Cakes in Muffin Tins which have a similar gooey center but it is baked differently.
However, once you check it with a spoon, like by digging it, the spoon will go in, and hot melted chocolate will ooze out.
And if I talk about taste, it is rich, warm, and also not overly sweet. Also, you can make it overly sweet, but I didn’t. So, it is good for any dark chocolate fan.
Chocolate Lace Cup Cake Ingredient Alternatives
If you’re out of something or want to adjust based on your diet, here are some useful substitutions.
For Chocolate:
- You can use dark chocolate (for less sweetness)
- Milk chocolate (If you prefer an extra sweet taste)
- Vegan chocolate (If you want a dairy-free version of this lava mug cake)
For Milk:
- Almond milk, oat milk, soy milk, or coconut milk all work better; they’re dairy-free, too, so perfect for any vegan.
- You should avoid using water; it will reduce the richness.
For Flour:
- You can use a gluten-free all-purpose blend (1:1 ratio)
- Oat flour or almond flour can also work well, but the texture will be denser; if you’re okay with them, go ahead.
Tips for the Perfect Mug Lava Cake
If you want a perfect gooey center every time, follow these tips:
- Don’t overmix the batter: You can just mix until the ingredients aren’t properly combined.
- Microwave timing matters: Around 50 seconds is usually enough. More than that, and your cake will become a brownie cake.
- Use a microwave-safe mug: Avoid using a bowl or plastic cup.
- Choose a mug that’s tall rather than wide. It helps your cake rise and keeps the center molten.
- Let it rest before eating: About one minute is enough so you don’t burn your mouth, and the texture settles. But if you like hot cake, then go ahead.
Nutrition Value (Approx, per serving)
These values will be different depending on the chocolate brand and milk type you use. You can read that on the ingredients packet, but generally, it will be as follows:
- Calories: 300–350
- Fat: 18g
- Carbohydrates: 35g
- Sugar: 20g
- Protein: 4g
If you top it with ice cream or whipped cream, it will add extra calories to the lava cupcake.
Why This Is Better Than Store-Bought Lava Cakes
There’s a reason why this is better than buying those frozen lava cakes or boxed mug cake mixes from the market:
- No preservatives
- No eggs
- You know what’s inside
- Fully customizable
- Microwave-friendly
- Much cheaper than buying outside
And, of course, it’s a fresh and warm lava chocolate cake, which can be made in minutes.
I sometimes consider making it when suddenly cravings hit me. You can also make it for date nights, solo movie nights, or even when you want to impress someone with zero effort.
What to Serve with Chocolate Lava Mug Cake
There are many things you can serve with this 3 ingredient lava mug cake for an upgraded dessert experience.
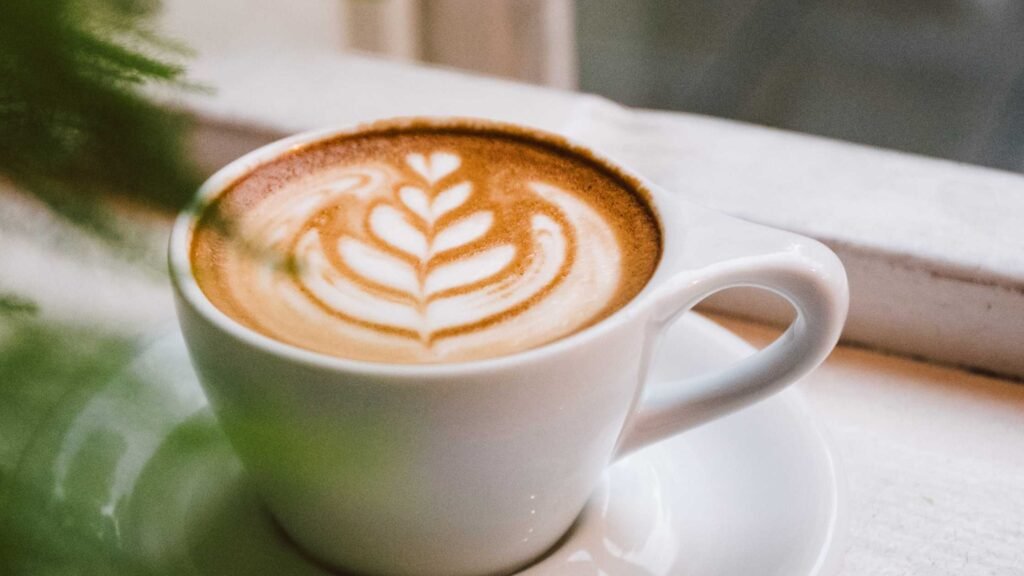
Drinks and Beverages options:
- Coffee: Especially the espresso or cold brew. If you love coffee + chocolate combos, try Starbucks Dark Chocolate Mocha Recipe.
- Milk: Cold milk and warm lava cake are a classic combo.
- For something cozy and seasonal, Williams Sonoma Hot Chocolate is a beautiful side drink.
Toppings:
- Vanilla ice cream: it’s a classic pairing.
- Whipped cream: it will add a dollop on top before serving.
- Chopped nuts: Walnuts or hazelnuts for crunch; besides this, you can use other nuts and dry fruits; most work better with this chocolate cake recipe.
- Fresh berries: Raspberries, strawberries, or blueberries. A good alternative is Luxury Chocolate Covered Strawberries if you want an extra indulgent side.
Side Snacks:
- You can have a small piece of dark chocolate on the side for extra richness. I usually don’t dry eating chocolate with chocolate recipes, but sometimes I prefer drinks.
- Try it with Crumbl Semi-Sweet Chocolate Chip Cookies for a crunchy contrast.
- If you love salty-sweet flavors, pair with Chocolate Covered Pretzel Rods for a fun twist.
Conclusion
This Chocolate Lava Mug Cake 3 Ingredients No Egg is quick, easy, and hits every sweet spot.
It’s a single-serve molten chocolate dessert that takes less than 10 minutes—perfect for late-night cravings or a quick treat.
And the good thing is, You don’t need an oven, eggs, or any baking skills.
You can also make it on lazy weekends, or if you want something quick after dinner.
Serve it with ice cream, milk, or berries, and enjoy every bite of your homemade chocolate lava cup cake.
FAQs About Chocolate Lava Mug Cake (3 Ingredients)
Here are a few things you need to know about the recipe:
Can I use dark chocolate instead of semi-sweet?
Yes. It’ll be less sweet but still rich in taste. And you can add a little sugar if you want to balance it.
Can I make this 3 ingredient chocolate lava mug cake ahead of time?
I won’t recommend it, because It’s best served fresh. But you can mix the batter, cover it, and refrigerate.
Microwave when you are ready to eat.
Why didn’t I get the lava center?
It most probably you’d have overcooked it. You should try microwaving it for 30-50 seconds.
How long can I store leftovers?
If you want to store it so that you can eat it later, remember that it won’t taste the same after cooling.
But you can cover and refrigerate for a day. And then microwave for 10–15 seconds before eating next time.
Chocolate Lava Mug Cake 3 Ingredients No Egg Recipe
Ingredients
- 1/3 cup 60g semi-sweet chocolate chips or chopped chocolate
- 3 tbsp milk regular or plant-based like almond/oat/coconut
- 2 tbsp all-purpose flour
Optional (Recommended):
- A few extra chocolate chips for center
- Pinch of salt to balance sweetness
- Powdered sugar or vanilla ice cream for topping
Instructions
Step 1: Melt the Chocolate
- In a microwave-safe mug, add chocolate chips. Microwave for 30 seconds, stir, then microwave again for 15–20 seconds until fully melted.
Step 2: Add Milk and Flour
- Add 3 tbsp milk to the melted chocolate and mix well. Then stir in 2 tbsp flour until smooth and lump-free. Batter should be thick but pourable.
Step 3: Add Extra Chocolate (Optional)
- Press a few chocolate chips into the center of the batter for extra lava effect.
Step 4: Microwave
- Microwave the mug on high for 50 seconds. Edges should be set, center should look slightly wet.
Step 5: Cool Slightly and Serve
- Let rest for 1 minute. Enjoy straight from the mug or flip onto a plate. Serve with ice cream, berries, or whipped cream if desired.
Notes
I’m a self-taught home cook who turns everyday ingredients into comforting, café-style recipes. I test everything in my own kitchen (sometimes more than once), tweak flavors how I like them, and share only what I actually enjoy.
Most of my recipes are chocolate-based or have a creative twist, and I keep them preservative-free, beginner-friendly, and fun to make.
If you love cozy drinks, healthier desserts, or bold flavor combos — you’re in the right place. [Read full story]