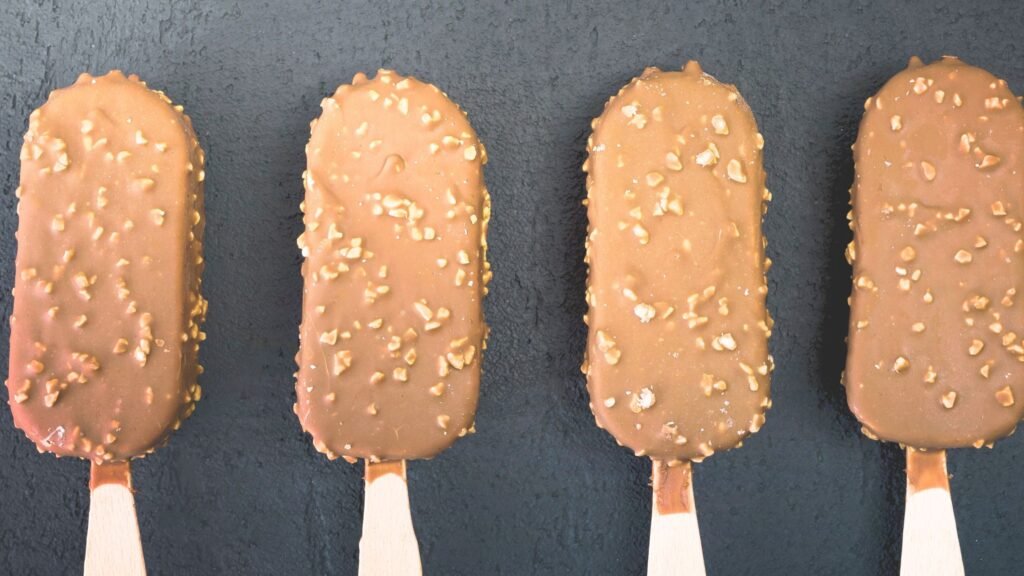
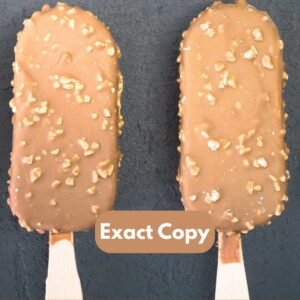
This Baskin Robbins Dubai Chocolate Bar recipe is my tested copycat of one of the most talked-about ice cream bars right now. And I can tell you from experience, making it at home is worth it.
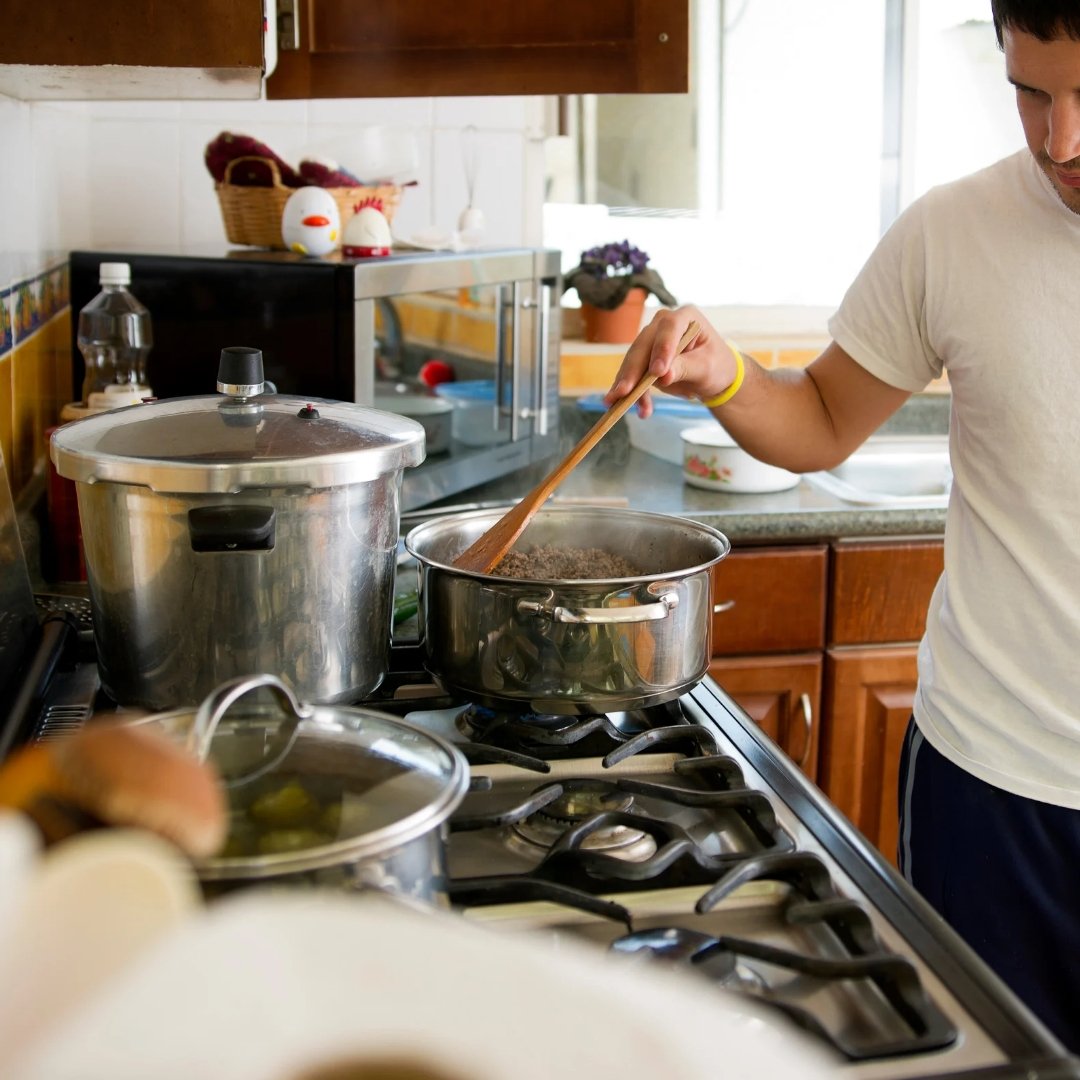
I’m someone who genuinely prefers cooking at home over buying from outside.
But my brother told me about the Baskin Robbins ice cream, so I gave in and went. I ordered the ice cream and then spotted the Dubai Chocolate Bar in the display case.
I bought it on impulse, and I liked it.
Also I started looking up how to make it at home.
The recipes I found online were close but not quite right, none of them matched what I’d actually tasted.
So I went my own way.
The first attempt was not good, the chocolate seized because I rushed it, and the bars were too soft when I dipped them.
On the second attempt, I fixed both those mistakes.
I got an almost-perfect copycat of the Baskin Robbins Dubai Chocolate Bar, it was fresher, cheaper, and made exactly how I like it.
| Quick Answer: The Baskin Robbins Dubai Chocolate Bar is a layered ice cream bar with a creamy ice cream core, crushed pistachio crunch layer, and a smooth chocolate shell. To make it at home: you have to melt high-quality chocolate, layer softened ice cream into molds, press in crushed pistachios, freeze overnight, then dip in chocolate. Full step-by-step below. |
How to Make Baskin Robbins Dubai Chocolate Bar
Ingredients
Scale these up or down depending on how many bars you’re making, you’ll get about 6 to 8 bars with this quantity.
Chocolate Coating
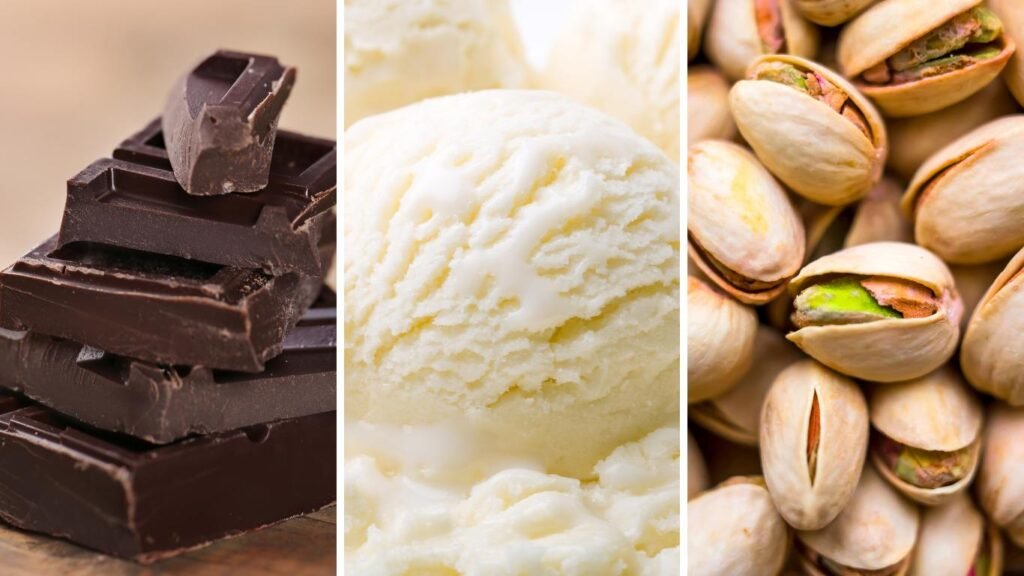
- 200g high-quality chocolate: Dark, milk, or white. I used dark. Lindt, Callebaut, or Valrhona melt well without seizing
- 1 tablespoon coconut oil: It’s optional but recommended. Gives you a smoother, glossier shell
Ice Cream Layer
- 500ml vanilla or chocolate ice cream: store-bought or homemade both work well
- Häagen-Dazs or Ben & Jerry’s are great store options: their dense texture holds up better when dipped
- Let it soften for 5 minutes before using. It should be soft enough to spread, not melted
Crunch Layer
- 1/2 cup crushed roasted pistachios: this is what makes it taste like the actual Baskin Robbins version. Lightly salted is better than plain
- Almonds or hazelnuts also work if you don’t have pistachios
Optional Toppings
- 2 tablespoons caramel sauce: Ghirardelli or Smucker’s work well
- 1/4 cup cookie crumbs: Oreo or digestive biscuits for extra texture
- Edible gold dust: if you’re serving at a special occasion and want that luxury look
Instructions
Before You Start
Set up silicone molds or line a baking tray with parchment paper.
After that, measure all the ingredients first.
You can make this recipe quickly once you begin and you don’t want to be hunting for anything mid-step.
Step 1: Melt the Chocolate
This is where I went wrong the first time, I rushed it and the chocolate seized completely, you should not make the same mistake.
Use a double boiler or microwave.
If microwaving, go in 15–20 second bursts and stir between every single one. Don’t walk away.
Burned or seized chocolate cannot be fixed, you’ll have to start over with fresh chocolate.
Once fully melted, stir in the coconut oil. It thins the chocolate slightly and creates that smooth, glossy shell.
If you want a professional snap when you bite in, you can temper the chocolate, it’s an extra step but worth it for special occasions.
Step 2: Layer the Ice Cream
Let your ice cream soften for about 5 minutes. It should be soft enough to spread but not melted.
There’s a real difference and it matters for the final texture.
Spread it evenly into molds using an offset spatula.
Then freeze for 15 minutes before adding the crunch layer.
This one step stops everything from sliding around when you add toppings.
Step 3: Add the Crunch Layer
Sprinkle crushed pistachios over the ice cream layer and press them in gently with the back of a spoon.
They need to be embedded slightly, not just sitting on top, or they’ll fall off when you dip the bars.
Add caramel drizzle or cookie crumbs now if you’re using them.
Step 4: Freeze Until Completely Firm
Minimum 2–3 hours. Overnight is better, and honestly what I recommend every time now.
I make mine in the evening and dip them the next morning.
The bars hold their shape perfectly, the chocolate sets cleanly, and the whole process is stress-free.
Step 5: Dip and Set
Remove bars from molds carefully and work quickly, they warm up fast once out of the freezer.
Dip each bar into the melted chocolate and let the excess drip off. A fork works better than tongs here for draining excess chocolate cleanly.
Place on parchment paper and freeze for 5–10 minutes until the shell is fully set.
Drizzle with extra chocolate or caramel right before serving if you want that finishing touch.
Ingredient Substitutions
Whatever your dietary preference, this recipe works for you:
- Vegan: Dairy-free chocolate (Hu Chocolate or Enjoy Life) + So Delicious or Ben & Jerry’s Non-Dairy ice cream
- Sugar-free: Lily’s or ChocZero chocolate coating + Rebel Creamery or Halo Top Keto ice cream
- Nut-free: Swap pistachios for crushed graham crackers, puffed rice, or granola — different texture but still gives you the crunch
- Keto: Rebel Creamery ice cream + dark chocolate with 85%+ cocoa content
Pro Tips From My Two Attempts
These are the things I wish I’d known before my first (failed) batch:
- Slow down on the chocolate melting. 15–20 second bursts, stir every time. Rushed chocolate seizes and cannot be saved
- Freeze longer than you think. Soft bars fall apart the moment they hit hot melted chocolate
- Press the nuts in firmly, don’t just drop them on top
- Use a fork for dipping, not tongs, it drains excess chocolate much more cleanly
- Pistachios over everything else, I tried almonds first, they were good, but pistachios are what make this taste like the actual Baskin Robbins bar
- Making multiple flavors? Freeze each layer separately for 15 minutes before adding the next
How to Store Homemade Dubai Chocolate Bars
Wrap each bar individually in parchment paper and store in an airtight container in the freezer. They keep well for up to 2 weeks.
For storage beyond a week, add a layer of foil over the container to maintain freshness and prevent freezer burn.
When you’re ready to eat, let the bar sit at room temperature for about 1 minute. The shell softens just enough to bite through comfortably without cracking.
Making ahead for a party? These are ideal for that. Prepare 1–2 days in advance, store properly, and add a quick drizzle of chocolate or fresh crushed pistachios right before serving so they look freshly made.
Nutrition Per Bar (Approximate)
| Nutrient | Per Bar (approx.) |
| Calories | 250–300 kcal |
| Fat | 15–20g |
| Sugar | 20–25g |
| Protein | 5–7g |
Using dark chocolate (85%+) and a lower-sugar ice cream brings both the calorie and sugar numbers down meaningfully.
The sugar-free and keto swaps mentioned above make the biggest difference if you’re tracking macros.
What to Serve With Baskin Robbins Dubai Chocolate Bars
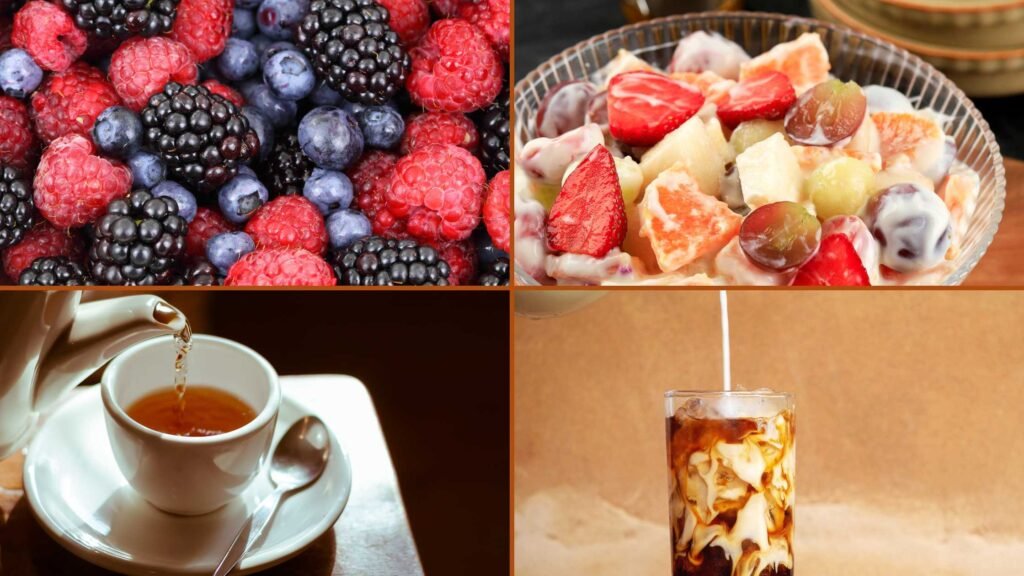
These bars are rich enough to stand alone, but if you’re building a dessert spread:
- A hot espresso or strong black coffee, the bitterness will cuts through the sweetness perfectly
- Cold milk: classic pairing that always works
- Fresh berries or a fruit salad: the acidity creates a great contrast with the chocolate
- Whipped cream and extra chocolate sauce if you want to plate it as a proper dessert
Homemade vs Store-Bought, Is It Worth Making Yourself?
After going through two attempts to crack this recipe, here’s my honest take:
- Cost: Making 6–8 bars at home costs noticeably less than buying the same number from Baskin Robbins
- Control: The store version is fixed. At home you control every component — ice cream flavor, nut choice, chocolate type, toppings
- Freshness: No preservatives, no artificial additives — ingredients you chose and handled yourself
- Satisfaction: There’s something genuinely rewarding about making a copycat that holds up against the original
Is it more effort than just buying one? Yes. Is it worth it? Also yes, especially once you’ve done it once and know exactly what you are doing.
Final Thoughts
I genuinely didn’t think I would buy a baskin robin bar on impulse, and then make it at home.
So, I wish you luck, and remember the three things that make the biggest difference: don’t rush the chocolate melting, freeze the bars overnight, not just for a few hours, and use pistachios over any other nut.
Those three things are the gap between a good bar and one that actually competes with the Baskin Robbins version.
If you try this recipe, leave a comment and let me know how it went, especially if you put your own spin on it.
I’d love to hear what flavors and combinations you experimented with.
Frequently Asked Questions
What’s inside the Baskin Robbins Dubai Chocolate Bar?
Three core ingredients: creamy ice cream, a crunchy pistachio layer, and a chocolate shell.
Some versions include caramel drizzle or cookie crumbles, but the pistachio crunch layer is what defines it and sets it apart from a regular dipped ice cream bar.
What are the ingredients in the Baskin Robbins Dubai Chocolate Bar?
High-quality chocolate for the coating, premium ice cream for the core, crushed roasted pistachios for the crunch layer, and optional caramel sauce or cookie crumbs.
That’s the base, everything else is customization.
How many calories are in the Baskin Robbins Dubai Chocolate Bar?
The homemade version comes in at approximately 250–300 calories per bar depending on the chocolate and ice cream you use.
Using dark chocolate and a lower-sugar ice cream brings it down meaningfully.
Can I use dairy-free ice cream?
Yes, completely. So Delicious and Ben & Jerry’s Non-Dairy both work well and freeze properly for dipping.
If you want to make your own, blended frozen bananas with a splash of coconut cream works surprisingly well and freezes cleanly.
How long do homemade Dubai Chocolate Bars last in the freezer?
Up to 2 weeks when wrapped individually in parchment paper and stored in an airtight container.
Add a foil layer over the container for storage beyond a week.
Let bars sit at room temperature for 1 minute before eating.
Can I make these ahead of time for a party?
This is actually one of the best make-ahead desserts you can do.
Make them the night before, store properly, and do a quick drizzle of chocolate or a sprinkle of fresh pistachios right before serving so they look freshly made.
What if I don’t have silicone molds?
A baking tray lined with parchment paper works perfectly fine.
Shape the softened ice cream into rough bar shapes, freeze until fully firm, then dip. They won’t be as uniform but they taste identical.
Baskin Robbins Dubai Chocolate Bar Recipe | Easy Copycat
Ingredients
For the Chocolate Coating:
- 200 g high-quality chocolate dark, milk, or white
- 1 tbsp coconut oil optional, for a glossy finish
For the Ice Cream Layer:
- 500 ml vanilla or chocolate ice cream store-bought or homemade
For the Crunchy Layer:
- 1/2 cup crushed nuts pistachios, almonds, peanuts, or hazelnuts
Optional Toppings:
- 2 tbsp caramel sauce Ghirardelli or Smucker’s
- 1/4 cup cookie crumbs Oreo or digestive biscuits
- 1 tbsp sprinkles for extra decoration
Instructions
Preparation
- Prepare silicone molds or line a baking tray with parchment paper.
- Measure all ingredients before starting.
Step 1: Melt the Chocolate
- Melt chocolate using a double boiler or microwave, stirring every 15-20 seconds.
- Add coconut oil for a smooth, glossy finish (optional).
Step 2: Layer the Ice Cream
- Let ice cream soften slightly (not fully melted).
- Spread it into the molds or tray using a spoon or spatula.
- Freeze for 15 minutes for a firmer layer.
Step 3: Add the Crunch
- Sprinkle crushed nuts or other toppings over the ice cream.
- Press toppings gently to ensure they stick.
- Drizzle with caramel sauce or add cookie crumbs if desired.
Step 4: Freeze and Set
- Freeze the bars for at least 2-3 hours (preferably overnight).
Step 5: Unmold and Coat with Chocolate
- Remove the bars from the mold carefully.
- Dip each bar into the melted chocolate, letting excess drip off.
- Freeze for another 5-10 minutes to fully set the chocolate.
Step 6: Serve and Enjoy
- Optional: Drizzle with extra chocolate sauce or edible gold dust for a luxurious touch.
Notes
- You can customize it with vegan, keto, or sugar-free ingredients.
- Always use high-quality chocolate for the best texture and taste.
- Freeze the layers separately for extra smooth bars.
I’m a self-taught home cook who turns everyday ingredients into comforting, café-style recipes. I test everything in my own kitchen (sometimes more than once), tweak flavors how I like them, and share only what I actually enjoy.
Most of my recipes are chocolate-based or have a creative twist, and I keep them preservative-free, beginner-friendly, and fun to make.
If you love cozy drinks, healthier desserts, or bold flavor combos — you’re in the right place. [Read full story]