

I recently made an easy chocolate sauce for ice cream that goes hard — a magic shell-style chocolate topping that hardens instantly when poured over cold ice cream.
Before that, I had tried a store-bought chocolate sauce for ice cream, but that melted off my ice cream and left me a soggy mess. That’s why I tried this.
How to Make Chocolate Sauce for Ice Cream That Goes Hard
Chocolate sauce for ice cream that goes hard is a magic-shell-style topping. It melts warm and instantly snaps into a crisp chocolate shell when it hits cold ice cream.
Ingredients:
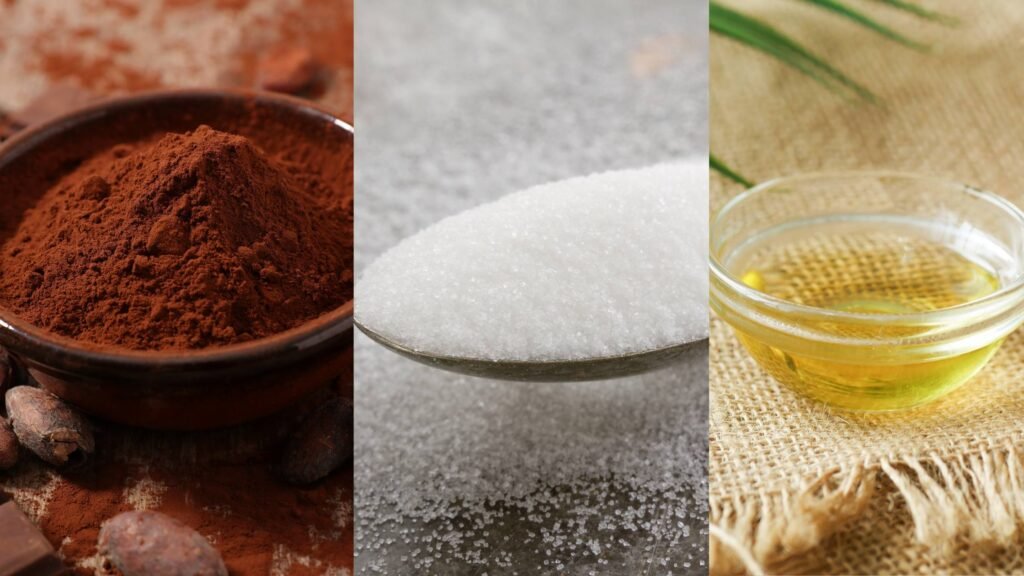
- ½ cup (50g) Dutch-processed cocoa powder: It will give deep, smooth chocolate flavor
- ½ cup (100g) granulated sugar – or ¼ cup (60ml) honey/maple syrup for natural sweetness
- ¼ cup (60ml) coconut oil: It melts fast and gives hard shell texture (you can use butter for creaminess or heavy cream for a silky texture)
- 1 teaspoon vanilla extract (optional): for extra aroma
- ⅛ teaspoon sea salt (optional): It will enhances chocolate flavor
- 1 tablespoon milk or cream (optional): only if you want a thinner consistency
- ½ teaspoon espresso powder (optional): for deeper, café-style flavor
Instructions:

- Melt the Base: In a small saucepan over low heat, you have to melt ¼ cup coconut oil and whisk ½ cup cocoa powder until smooth and lump-free.
- Add Sweeteners: Add ½ cup sugar (or sweetener). Then mix it continuously and dissolve it. If you use honey or maple syrup, they’ll blend faster.
- Incorporate Flavors: Remove your saucepan from heat. And add 1 teaspoon vanilla, ⅛ teaspoon sea salt, and espresso powder.
- Adjust Consistency (Optional): If you want a thinner and pourable sauce, add 1 tablespoon milk or cream and whisk to make it glossy.
- Cool & Store: Bring your homemade Torani sauce to room temperature, pour into a jar, and refrigerate. It will be fresh for up to 2 weeks. Next time reheat your sauce (10-second microwave intervals or low heat on stovetop).
Ingredient Substitutes for Dietary Needs
- Vegan Options: You can replace cream with almond or oat milk and use coconut oil or vegan butter.
- Low-Sugar Alternatives: Swap sugar with monk fruit, stevia, or erythritol. But keep in mind that monk fruit and stevia are highly concentrated, so you can adjust the amount if you want to avoid excessive sweetness.
- Nut-Free Version: You want to ensure that all the ingredients are nut-free, especially when you are allergic to any nut.
- Gluten-Free: This easy homemade chocolate sauce for ice cream that goes hard is already a gluten-free recipe. But I still recommend you check the label on cocoa powder because some brands may have gluten. But in most cases, they are gluten-free.
Customization Ideas for Your Chocolate Topping
Make this recipe your own with these fun variations, adding unique flavors and twists while keeping the perfect hardening texture.
Mint Chocolate Sauce:
- Add a few drops of peppermint extract.
- Start with ¼ teaspoon and adjust to taste, as peppermint can be quite strong.
This variation pairs well with vanilla, chocolate, or cookies-and-cream ice cream.
Spiced Chocolate Sauce:
- Stir in cinnamon, chili powder, or a pinch of cayenne for a kick.
- For balance, start with ⅛ teaspoon and adjust to your spice preference.
White Chocolate or Caramel Swirl:
- Mix in melted white chocolate or caramel for a decadent twist.
- Swirling in melted white chocolate creates a visually stunning marbled effect, while caramel adds a rich buttery contrast to the deep chocolate flavor.
- Drizzle in the swirl just before cooling for the best presentation.
How to Use Your Hardening Chocolate Sauce

- Classic Pairings: You can drizzle this hardening chocolate sauce over vanilla ice cream, brownies, or even fresh strawberries (It will create signature chocolate topping that hardens instantly). If you’re into fruit-topped desserts, this white chocolate cheesecake stuffed strawberries recipe will be an excellent.
- Creative Uses: Dip for fruit, skewers, layers in parfaits, or swirl into a milkshake. For example, if you dip fruits and banana slices in it, it will create a delicious treat.
- Presentation Tips: You can add sprinkles, crushed nuts, or edible glitter if you want to make it a photo-worthy dessert. If you want to use nuts, I recommend trying almonds, hazelnuts, or pistachios for a nutty crunch.
Other Desserts to Pair This Sauce With:
- Try this sauce over 3-ingredient avocado chocolate pudding — it’ll add a hard chocolate layer on top.
- Use as a dip for these chocolate-covered dates with almond butter for an even deeper chocolate bite.
- Drizzle this sauce over bakery-style oatmeal chocolate chip muffins to create a crisp chocolate topping twist.
Common Chocolate Sauce Problems You Might Face
Even the best recipes can run into minor issues. Here’s how to fix common chocolate sauce problems to ensure perfect results every time.
- Sauce Doesn’t Harden: You need to adjust the fat-to-cocoa ratio or chill your ice cream longer so that your homemade ice cream chocolate sauce hardens properly. However, if the sauce remains soft, you can increase the amount of coconut oil or butter or whatever fat you’re using.
- The sauce is Too Thick: Just add a little milk or cream and reheat the sauce again. But make sure to stir it during the process.
- Sauce Loses Its Shine: You should use high-quality cocoa powder and avoid overheating because sometimes, overheating causes cocoa solids to separate, which makes the sauce dull and grainy.
Storage Tips for Your Homemade Chocolate Sauce
You need to properly store homemade chocolate sauce for ice cream to maintain its original texture and flavor for future uses.
- How to Store: You have to use an airtight container to store this easy homemade chocolate sauce for ice cream for around 2 weeks. Plus, I also like using glass jars as they work pretty well to preserve freshness and prevent the absorption of fridge odors. You can also try that.
- Reheating Instructions: Warm the ice cream sauce on the stove over the microwave. If you’re using a microwave, you need to heat it for a short interval, like 10 seconds. And you wanna stir that to prevent overheating. And if you’re using the stove, make sure the flame is low.
- Freezing Option: Freeze it for up to 3 months in small portions (I recommend an ice cube tray for easy portioning). Next time you want to use it, you need to keep the sauce at room temperature for some time and then reheat it to use again.
Nutrition Value of Your Chocolate Sauce
Keep in mind that these ingredients can vary depending on your Ingredient’s quality, quantity, etc. But this is just an approximate nutrition value that I calculated.
- Calorie Count: Around 100 calories per serving (2 tablespoons).
- Macronutrient Breakdown: 6g fat, 10g carbs, 1g protein.
Frequently Asked Questions
Can I use chocolate chips instead of cocoa powder?
Yes, but it will affect the texture because chocolate chips contain some arid fats and stabilizers, which affect hardening.
So, if you use chocolate chips, you should go with high-quality dark or semi-sweet chips.
Plus, you want to consider reducing additional fat to maintain the right consistency, like you can reduce coconut oil or butter.
Why is my sauce grainy?
This is the most common thing that usually happens when making ice cream chocolate sauce.
It happens because sugar is not fully dissolved. So, you will want to whisk your sauce continuously while cooking it. I recommend that you use granulated sugar or powdered sugar for a smooth texture.
How long does chocolate sauce take to harden on ice cream?
It takes just a few seconds. As soon as your warm chocolate sauce hits the cold ice cream, it will turn into a hard shell instantly.
This means the colder the ice cream, the faster and firmer the chocolate will be.
So make sure your ice cream is well frozen. If it is, then you can drizzle this easy homemade chocolate ice cream sauce.
Can I make hardening chocolate sauce ahead of time?
Yup, this homemade chocolate sauce for ice cream that goes hard stores perfectly. You will have to reheat it before using it next time.
What’s the best way to store leftovers?
Using an airtight container is the best way to store your homemade chocolate ice cream sauce leftovers.
By doing so, you can keep it set for around 2 weeks, but for a longer duration, you need to store it in small portions, like by using an ice cube tray. You can freeze it for up to 3 months and reheat it again to use it.

Chocolate Sauce for Ice Cream That Goes Hard (Copycat Magic Shell)
Ingredients
- ½ cup cocoa powder preferably Dutch-processed
- ½ cup granulated sugar or sweetener of choice
- ¼ cup coconut oil or butter for a silkier texture
- 1 teaspoon vanilla extract optional, for flavor
- ⅛ teaspoon sea salt optional, enhances flavor
Instructions
- Melt the Base: In a saucepan over low heat, combine coconut oil (or butter) and cocoa powder. Whisk continuously until smooth and lump-free.
- Add Sweeteners: Stir in granulated sugar (or sweetener). If using granulated sugar, mix until fully dissolved. If using honey or maple syrup, stir until properly combined.
- Incorporate Flavorings: Remove from heat and mix in vanilla extract and sea salt for added depth. Stir well.
- Achieve the Perfect Consistency: Continue whisking until the sauce is glossy and smooth. If too thick, add a little milk or cream to adjust consistency.
- Cool and Store: Let the sauce cool to room temperature before transferring to a jar. Store in the fridge for up to 2 weeks. Reheat before use.
Notes
- You can substitute sugar with monk fruit, stevia, or erythritol for a low-sugar version.
- Coconut oil helps the sauce harden faster, making it the best option for this recipe.
- This sauce can also be used for dipping fruits like bananas, strawberries, or apples.

I’m a self-taught home cook who turns everyday ingredients into comforting, café-style recipes. I test everything in my own kitchen (sometimes more than once), tweak flavors how I like them, and share only what I actually enjoy.
Most of my recipes are chocolate-based or have a creative twist, and I keep them preservative-free, beginner-friendly, and fun to make.
If you love cozy drinks, healthier desserts, or bold flavor combos — you’re in the right place. [Read full story]


turned out way better than I expected.